Installing a kitchen sink and faucet might seem like a daunting task but with the right guidance, it can be hassle-free. Whether moving into a new home or renovating, learning how to handle kitchen sink installation can save you time and money. This DIY sink guide walks you through installing a new sink and faucet, offering helpful plumbing tips to make the job easier.
Let’s dive into how you can accomplish this task efficiently and safely, transforming your kitchen into a space that blends style with practicality.
Step 1- Essential Tools and Materials Required
Before you begin with the installation process, it's crucial to gather the necessary tools and materials to ensure a smooth installation such as a new kitchen sink and faucet combination, adjustable wrench, screwdriver, silicone sealant, plumbers tape, etc. With getting your tools ready, now it will be easy for you to install the sink and faucet.
Step 2- Set Up your Work Area
In a DIY project, the first step is always preparation of the workspace. Make sure your workspace is clean, clear, and well-lit. If you’re removing an old sink, turn off the water supply and disconnect any electrical appliances nearby to avoid accidents. Place a bucket under the sink to catch any leftover water from the pipes. This simple step can save you from unnecessary mess during the sink faucet setup.
If you are removing an old existing sink, then make sure to turn off the valves and carefully disconnect the plumbing underneath. Use an adjustable wrench to loosen the nuts attaching the sink to the countertop. After removing the nuts, gently lift the sink out of its place. Scrape off any old sealant from the countertop surface for a clean finish and this will further ensure the proper fitting of the new sink and will also help to prevent any leakage down the road.
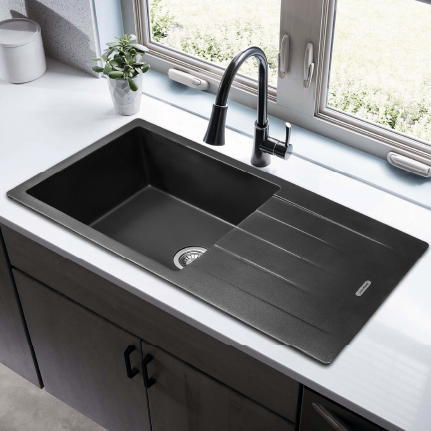
Step 3- Setting Up the New Sink
Measure the sink and mark the layout on the countertop, position the sink into the countertop to check its fitting. Make sure that the sink fits perfectly into the cutout on your countertop, and is in level with the surface. If the fit isn’t perfect then adjust it until it aligns correctly and once the sink is in place, then apply a bead of silicone sealant around the edges to create a watertight seal. This step is crucial for preventing leaks and ensuring the longevity of your kitchen upgrades.
Step 4- Install the Faucet
Insert the Faucet through the designated hole in the sink or the countertop and secure it in place by tightening the mounting nuts underneath by using an adjustable wrench. Now apply the plumber’s tape to the threads of the faucet connections for a secure and leak-proof fit. Connect the hot and cold water supply lines to the corresponding valves on the faucet and double-check that the faucet is aligned correctly before tightening everything in place because a misaligned faucet can lead to functional issues later on.
Step 5- Connect the plumbing to check for leaks
After successfully installing the sink and the faucet securely in place, then connect with the plumbing by attaching the P-trap to the drain pipe and finally ensure all connections are tight and secure before checking for leaks. Before finishing up, turn on the water supply and test your new sink and faucet combination for leaks, run both hot and cold water to check for any drips or loose connections. If you notice any leaks, then tighten the connections or add more plumber’s tape as needed to ensure that your installation is watertight and ready for everyday usage.
Plumbing Tips for DIY Enthusiasts
Know Your Plumbing: Familiarize yourself with the basics of your home’s plumbing system before attempting any DIY project.
Turn Off the Water: Always shut off the water supply before beginning any sink or faucet installation.
Use Quality Materials: Invest in high-quality sinks, faucets, and plumbing components for a durable and long-lasting kitchen upgrade.
Check for Compatibility: Ensure your new sink and faucet are compatible with your countertop and existing plumbing system.
Installing a new kitchen sink and faucet doesn’t have to be an intimidating task. With the right tools, a clear DIY sink guide, and a bit of patience, you can upgrade your kitchen in no time. By following these steps, you’ll not only enhance the functionality of your space but also add a touch of style and sophistication to your home. Now that you have a step-by-step guide at hand, make the DIY project of sink and faucet installation fun and smooth without any inconvenience.